I had problems when trying to animate the characters that I had merged from a separate file I had created them in.
Moving and positioning the biped worked but when I used autokey to start the animation there would be an error and 3ds max would crash when any of the bones were moved.
I made a new biped in the scene where I needed to animate the character and applied this to the character mesh allowing me to animate the character without the error.
Showing posts with label biped. Show all posts
Showing posts with label biped. Show all posts
Thursday, 7 April 2011

Tuesday, 5 April 2011
Adding the character to the truck
 I linked the character to the truck so that it would move along with it and then started to animate the biped so that he would have some movement.
I linked the hands of the biped to the truck so that they would be planted there so that when moving the character his hands would stay in the same place as though he was hanging on.
Thursday, 24 March 2011
Attaching clothes
 After having created the clothes for the model I needed to attach them to the body mesh so that they would also move with the biped. I tried adding another skin modifier to only the clothes but this didn't work.
So that there were not a lot of extra vertices that wouldn't be needed, as they were covered by the clothes, I deleted the vertices that wouldn't be seen.
 I then used the attach tool to put the clothes into the same object as the body. Now the clothes moved with the biped as they were all one single object. I didn't weld the vertices together so that the parts kept their shape and to save time.
 I don't think that you will be able to notice this as the viewer will not look that closely and I scaled some sections so that you will not be able to holes in the character.
 Here are render of bond for the crane scene (above) and the airport scene (below)
Bond
I finished the person model that I was creating and then added the hand model to the mesh. I had to join and reposition some of the vertices in the arm as there weren’t the same amount of vertices in the end of the hand and the arm. I could have done with adding some more edge loops to the arm but I didn’t want to have to adjust the rest of the model as this looked ok.
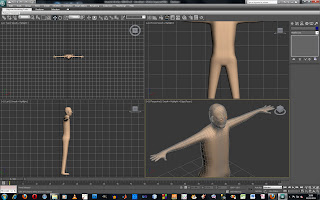 The model contained some lumps and bumps that could be removed with more time but it looks ok with a turbosmooth applied. The model could be improved by sorted out to topology so that the edges flow better. Some parts of the model don’t look perfectly correct and I had problems with the mouth. When the turbosmooth was added the mouth opened further than I had expected. By adding some more vertices and adjusting them I was able to fix the mouth.
To model the hair I cloned some of the polygons from the head to a new object and then added a shell modifier to create some height to the polygons. I don’t know if this is the right way to go about it but it worked ok. I didn’t want to create hair using hair and fur as this wouldn’t have gone with the character who looked more cartoony.
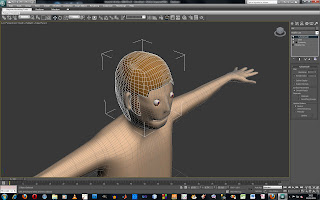 I collapsed the modifiers and then edited the vertices. I was going to apply a turbosmooth but decided not to as it looked too smooth with this applied.
I decided to model the clothes as separate objects as I thought that this would make it easier to change the clothes for the different scenes and to create the different characters.
I tried to use the garment maker but did not succeed so decided to use a similar way to how I modelled the hair.
I cloned the man model and then deleted the head, legs and hands so that I could make a shirt. I scaled the section that was left so that it was larger than the character and moved it into place before scaling specific sections and moving vertices to stop parts of the character showing through the clothes. Then I modelled detail onto this, like creating a collar. I used the same method to model the shoes, jacket and trousers.
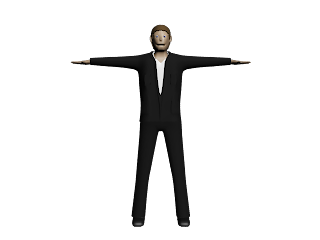 After having modelled Bond I used the biped to rig the model. I changed the biped parameters so that the biped had fingers but no toes, as Bond is wearing shoes. I added a biped positioned it in place and scaled the sections to the correct size.
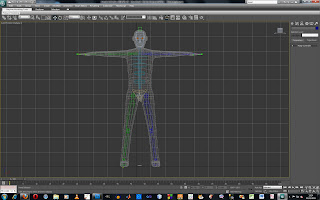 In the motion panel I used copy posture button to copy the position of bones on one side then with the bone on the other side selected I used the paste posture opposite button to position the bone in the same way on the other side. I could have used the symmetrical button to copy the adjustments made to the bones on to the one on the other side but I had already started moving the bones before finding out about this.
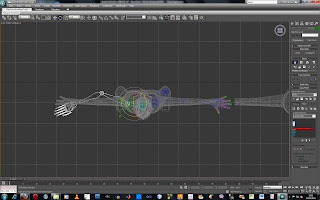 I then added a skin modifier to the mesh and added the bones for the biped to the skin modifier.
 The model contained some lumps and bumps that could be removed with more time but it looks ok with a turbosmooth applied. The model could be improved by sorted out to topology so that the edges flow better. Some parts of the model don’t look perfectly correct and I had problems with the mouth. When the turbosmooth was added the mouth opened further than I had expected. By adding some more vertices and adjusting them I was able to fix the mouth.
To model the hair I cloned some of the polygons from the head to a new object and then added a shell modifier to create some height to the polygons. I don’t know if this is the right way to go about it but it worked ok. I didn’t want to create hair using hair and fur as this wouldn’t have gone with the character who looked more cartoony.
 I collapsed the modifiers and then edited the vertices. I was going to apply a turbosmooth but decided not to as it looked too smooth with this applied.
I decided to model the clothes as separate objects as I thought that this would make it easier to change the clothes for the different scenes and to create the different characters.
I tried to use the garment maker but did not succeed so decided to use a similar way to how I modelled the hair.
I cloned the man model and then deleted the head, legs and hands so that I could make a shirt. I scaled the section that was left so that it was larger than the character and moved it into place before scaling specific sections and moving vertices to stop parts of the character showing through the clothes. Then I modelled detail onto this, like creating a collar. I used the same method to model the shoes, jacket and trousers.
 After having modelled Bond I used the biped to rig the model. I changed the biped parameters so that the biped had fingers but no toes, as Bond is wearing shoes. I added a biped positioned it in place and scaled the sections to the correct size.
 In the motion panel I used copy posture button to copy the position of bones on one side then with the bone on the other side selected I used the paste posture opposite button to position the bone in the same way on the other side. I could have used the symmetrical button to copy the adjustments made to the bones on to the one on the other side but I had already started moving the bones before finding out about this.
 I then added a skin modifier to the mesh and added the bones for the biped to the skin modifier.
Subscribe to:
Posts (Atom)